Lightning Web Components
Introduction
Lightning Web Components or LWC is another framework apart from the original Aura Framework which is also used to custom components for lightning.
LWC runs mostly on base Javascript and allows for easily using third party scripts as compared to the Aura framework.
But unlike the Aura Components, you can not directly create web components from the developer console. We need to install the salesforce CLI (sfdx) and setup VS code to create lightning web components.
Install the Salesforce CLI
On Windows
In order to install the salesforce CLI in Windows, download the CLI installer from here and run it.
On Linux
The CLI on linux is distributed in the form of .tar files. You first need to get the download url based on your system from this page.
1. The fetch the .tar file using this command and one of the URLs from the above link :
wget https://developer.salesforce.com/media/salesforce-cli/sfdx-linux-amd64.tar.xz
2. Then create a folder called ‘sfdx’ :
mkdir sfdx
3. Extract the .tar file into the above ‘sfdx’ folder :
tar xJf sfdx-linux-amd64.tar.xz -C sfdx –strip-components 1
4. Then run the installation script :
./sfdx/install
On Mac
Download the installation .pkg file from here. And double click on it to install the CLI to your system.
Checking Installation
After you have installed the CLI, to check the version of the CLI run this command :
sfdx –version
Install and Setup Visual Studio
Installation
Go to this link and download Visual Studio Code for your system (Linux/Windows/Mac). The downloaded file is an executable file for all three systems which will install Visual Studio Code on your system.
Install the Salesforce Extension for Visual Studio Code
1. Open the Visual Studio Code application.
2. Click on the ‘Extensions’ icon.
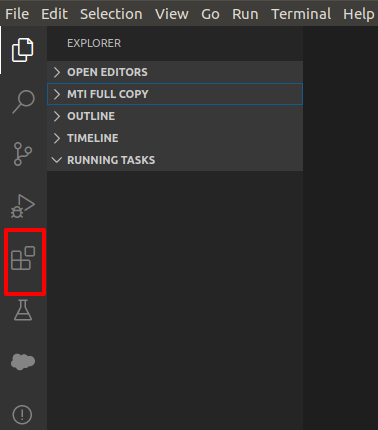
3. In the search bar, search for salesforce and click ‘install’ on the salesforce extensions pack to install the salesforce extension.
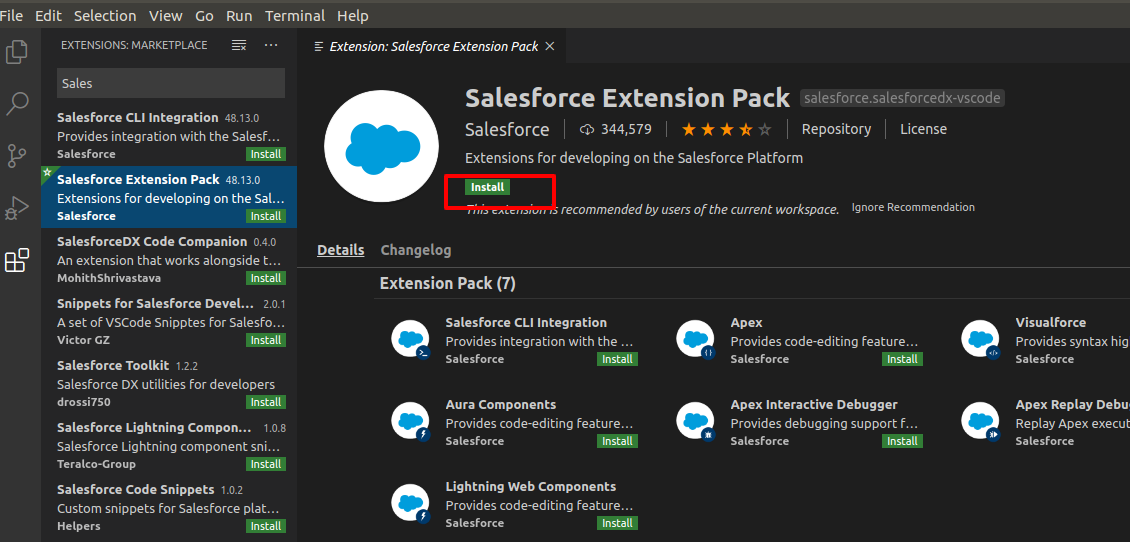
Your Visual Studio Code is now ready to use for Salesforce Development!
Create a Lightning Web Component
Create a Project
In order to create a lightning web component in our org, we need to create a project in our VS Code instance first.
Press ‘CTRL+SHIFT+P’ to open the CLI command menu in our vs code and select the ‘SFDX: Create Project’ command
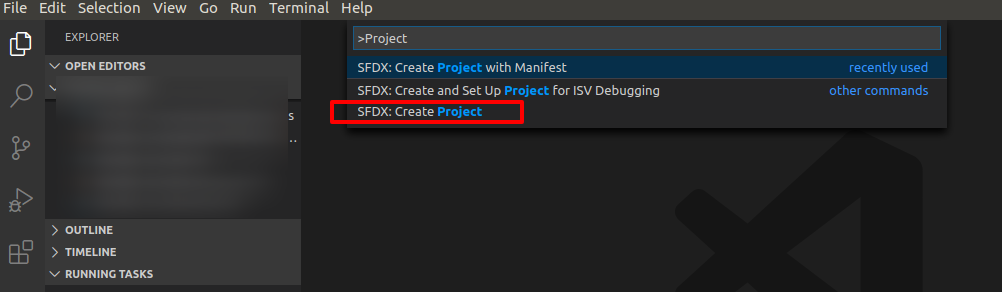
Choose the project type as ‘Standard’ and give it any name that you like! Then choose the local directory to save your project and click ‘Create Project’.
Connect your Org
To connect your org to your VS code, we need to run the ‘SFDX : Authorize an Org’ command from the command palette (CTRL + SHIFT + P)

This will open a browser window with the salesforce logic page so that we can enter our salesforce username and password.
It will ask you for permissions after you enter the correct username and password, allow it.

After successful login, your project should be created and linked with your salesforce org.
Create the Component
In order to create a new web component, run the ‘SFDX : Create Lightning Web Component’.
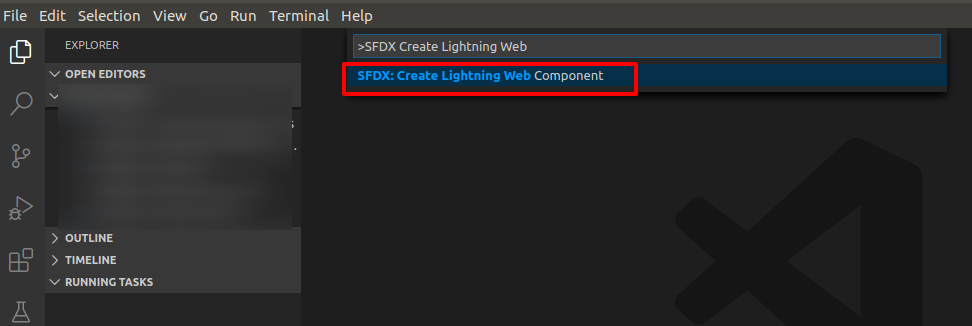
Enter the name as ‘helloworld’ for your new lightning web component.
Use the default ‘force-app/main/default/lwc’ directory to save the web component.
After the CLI runs and creates your component, you will see the following files have been automatically created for your component.

The ‘helloworld.html’ file contains the html markup for the lightning web component. This contains all the html tags which consist of the markup that will be rendered on the browser.
The ‘helloworld.js’ file contains all the javascript logic for the web component. This is the client side controller for the web component.
The ‘helloWorld.js-meta.xml’ file is used to define the configuration for the web component. The configuration includes the ‘design’ configuration for the components, which works as the same as design attributes in the aura components. This file also defines where you can use your web component, that is, in the record page/home page etc.
Now, override the code in your ‘helloworld.html’ to this :
<template>
    <div>
      <p>Hello, {text}!</p>
       <lightning-input label="Text Value" value={text} onchange={onchange}></lightning-input>
     </div>
 </template>
And, override the code in your ‘helloWorld.js’ to this :
   import { LightningElement } from 'lwc';
         export default class HelloWorld extends LightningElement {
             text = 'MyFirstComponent';
               onchange(event) {
                  this.text = event.target.value;
               }
            }
And finally, update the ‘helloWorld.js-meta.xml’ file to this :
<?xml version="1.0" encoding="UTF-8"?>
<LightningComponentBundle xmlns="http://soap.sforce.com/2006/04/metadata" fqn="helloWorld">
  <apiVersion>45.0</apiVersion>
  <isExposed>true</isExposed>
  <targets>
    <target>lightning__HomePage</target>
  </targets>
</LightningComponentBundle>
The ‘<target>lightning__HomePage</target>’ element in the configuration xml lets us use this web component in any of our lightning home pages via our lightning experience app builder. But before we can do that we need to deploy this component back to our org.
Deploy to your Org
In order to deploy this component to your org, we need to run the following command from the command palette (CTRL+SHIFT+P) : ‘SFDX: Deploy Source to Org’
In your deployment is successful from your VS code instance to your org, you would see a message like this in the console :
SFDX: Deploy Source to Org … ended with exit code 0
This means that the web component was successfully deployed to the org.
Previewing the Component
So, in order to a lightning web component, we need to add the component to a lighting page or tab. There is no ‘App’ like the Aura framework which can be used to preview your component.
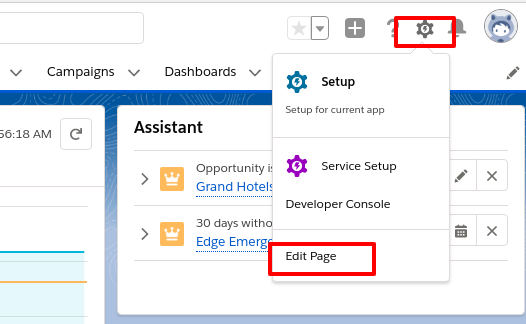
For the example we built, go to your home page and click on edit page from the wrench icon :
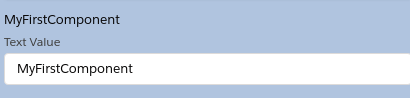
Once we open the app builder, we should be able to see our ‘helloWorld’ component in the app builder.
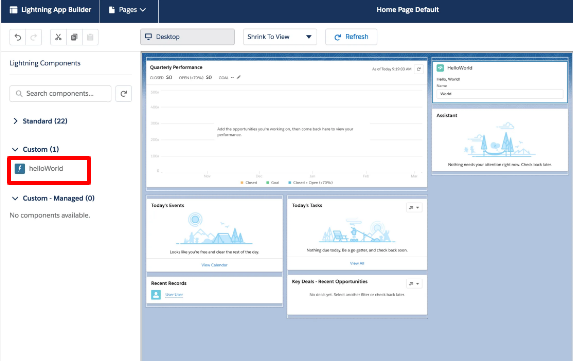
To preview it you should be able to drag it and add it to your page. Then you should be able to see your web component on your home page.
Output :