
What is Salesforce Community
Communities are medium by which organizations provide a way for their customers, and partners to connect. We can customize and create communities to meet our different business needs.
Communities are a unique way to share information to people who are key to business processes, such as customers, partners, or employees. Salesforce Provides a way to Use easy point-and-click branding tools or Use already developed Visualforce to create branded spaces.
Enabling Communities
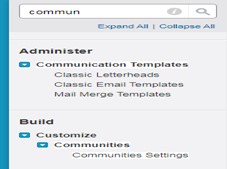
Step 1 : Go to Setup->communities->communities settings.
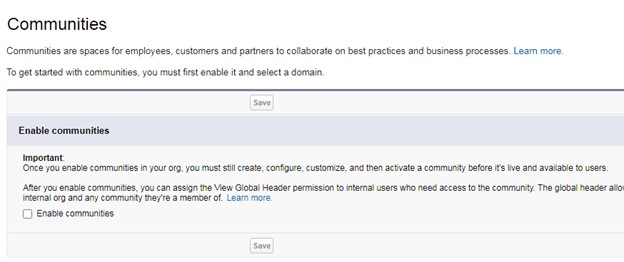
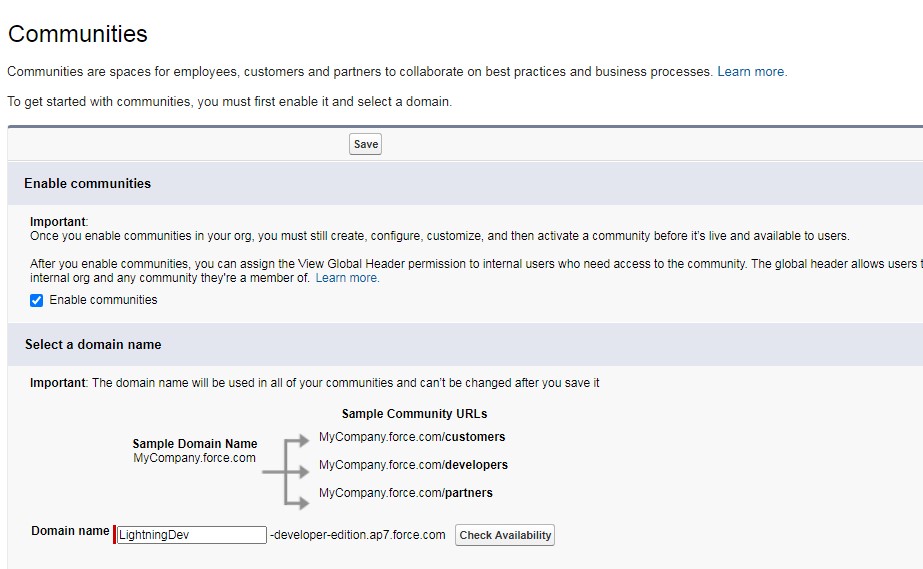
Step 2 : Communities settings Page will open. Check ‘Enable Communities’ on this screen.
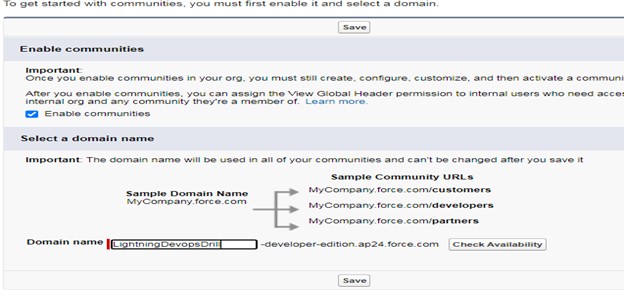
Step 3 : Search for Domain Name and Click ‘Check Availability’.
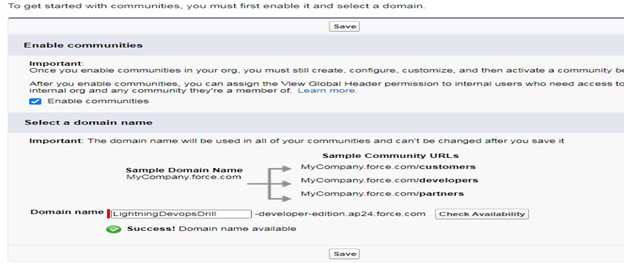
Step 4 : Success Message will appear in case domain searched is available. Finally Click Save.
Step 5 : User will be landed to communities Page with success message as below

Setting up Communities
To set up a Salesforce Community:
- From Setup, enter ‘Communities Settings’ in the Quick Find box and User would be landed to below screen.
- Register for a Communities domain for your organization by entering Desired Name and Click on ‘Check Availability’. If entered domain is available for use than click ‘Save’

- After Successful Registration of Domain , User will be shown a success Message as below , Now create a Salesforce Community by Clicking ‘New Community’

- User will be redirected to below Screen. Select ‘Salesforce Tabs + Visualforce’

- User will be redirected to below screen and Click ‘Get Started’.

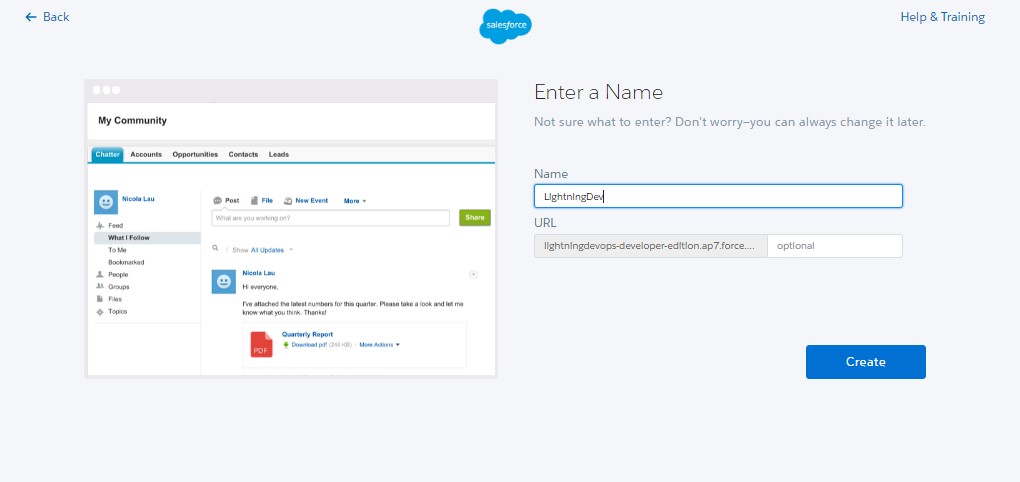
- Enter a Value in Name field which should be appearing as Heading for our Community.
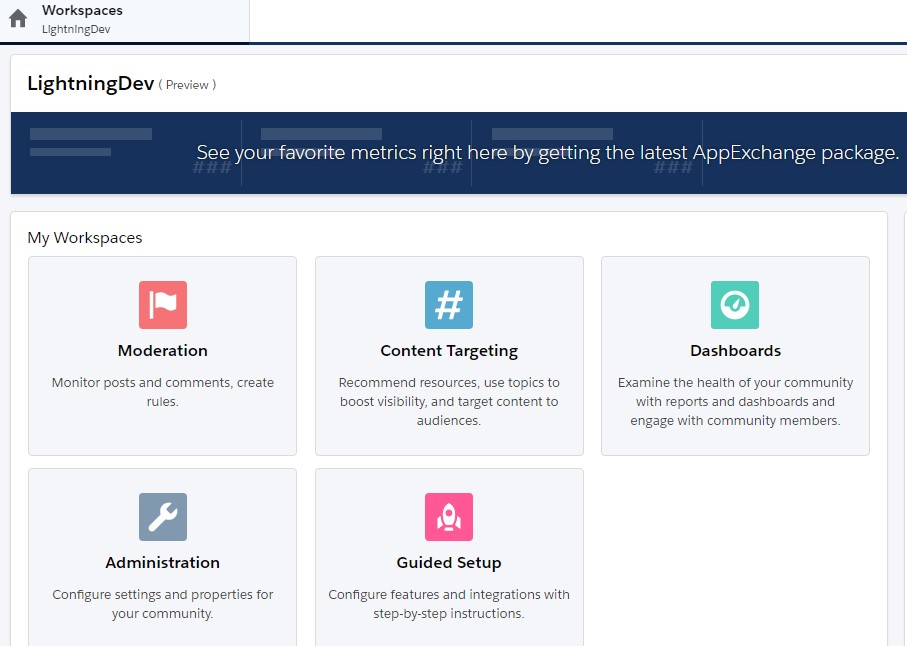
- Community is created successfully and user would be redirected to below screen. Click ‘Administration’ to manage all community access.
Preview Community
- Under ‘Administration’ different tabs would be visible. In settings Click on community URL.
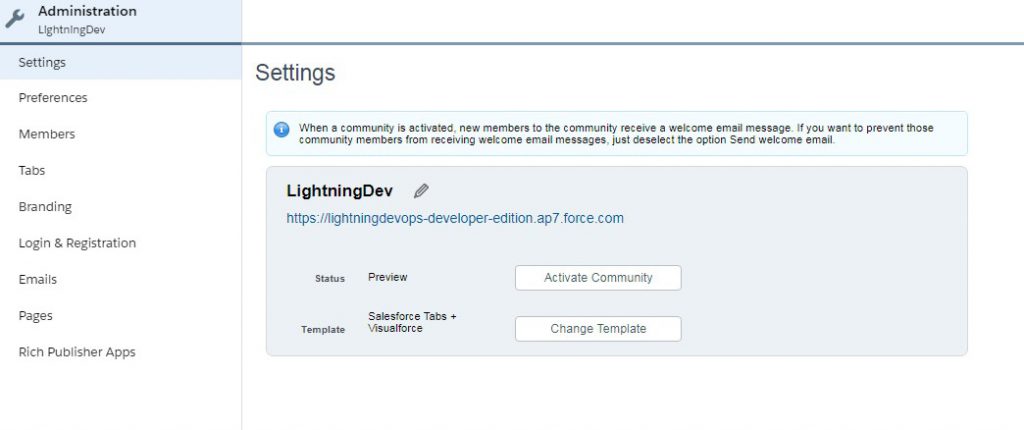
- Preview of Community will be shown to Administrator.

Managing Community Access
- Under ‘Members’ section , Admin can manage which all users should be able to access newly created community by selecting their profile and thereby providing access to Community.

Managing Community Tabs
- Under Tabs section we can control which all tabs should be available to community Users. Select all required tabs and click ‘save’

Community Login and Branding
Under Branding section, we can manage below :-
- Header of Community
- Footer of Community
- Color Scheme

Configuring Home screen
- Under Pages section we can control which screen to show users as home screen for community. It can be either a visualforce screen or custom build screen using Community Builder.

Community Security
For all communities created in an org, an entry for corresponding site is created.
- From Setup, enter Sites in the Quick Find box and Click Sites. User would be landed to below screen. Find ‘LightningDev’ listed for our community and click it.

- User will be landed to below site detail screen, On Site Detail Page , Click on ‘Public Access Settings’
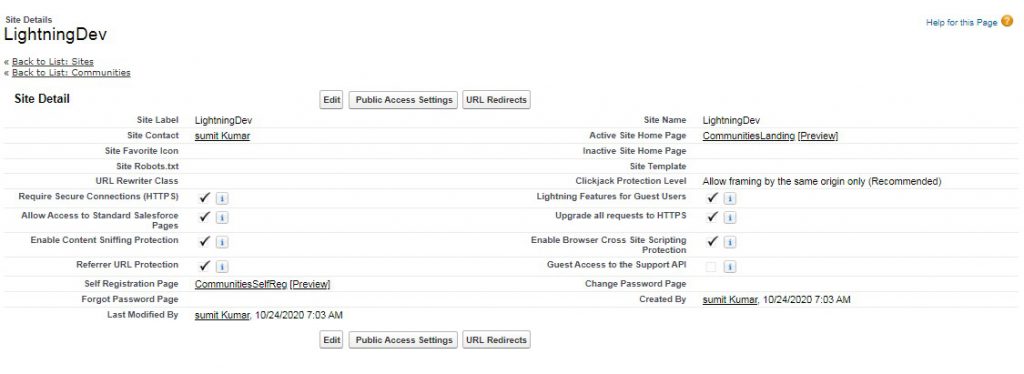
- Page which includes all profile permissions and settings for unauthenticated Guest User opens.

- In the site profile, we can control below settings :-
- Object permissions for site: To Control which all objects our guest user will be able to access via site.
- Visibility of custom apps. To Control which all apps our guest user will be able to access via site.
- Login hours: To specify during which hours users can access the site.
- IP Ranges : To Restrict the IP address ranges from which User can access the site
- Enable Apex controllers for our site.
- Enable Visualforce pages for our site.
- Different General and Administrative Permissions regarding Guest User.
Sharing Records to Community Users (authenticated)
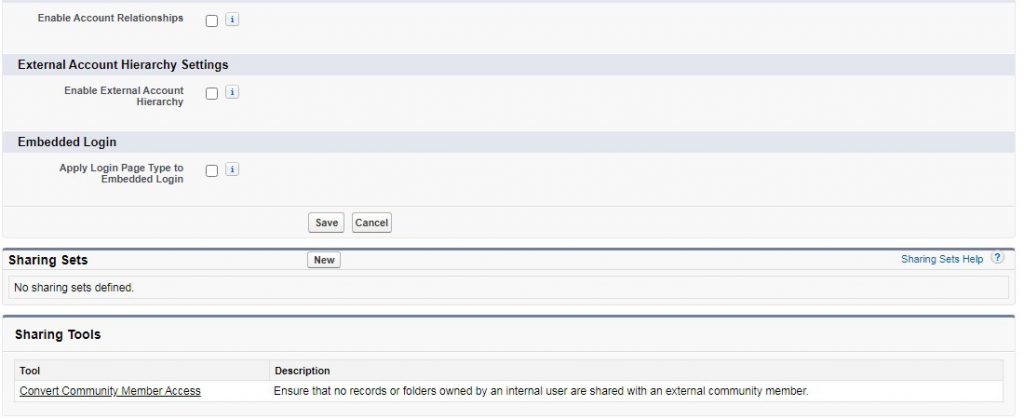
To share records with Community users we need to setup sharing sets
- From Setup, enter Community Settings in the Quick Find box and Click it. User will be landed to below screen. Click new under Sharing sets
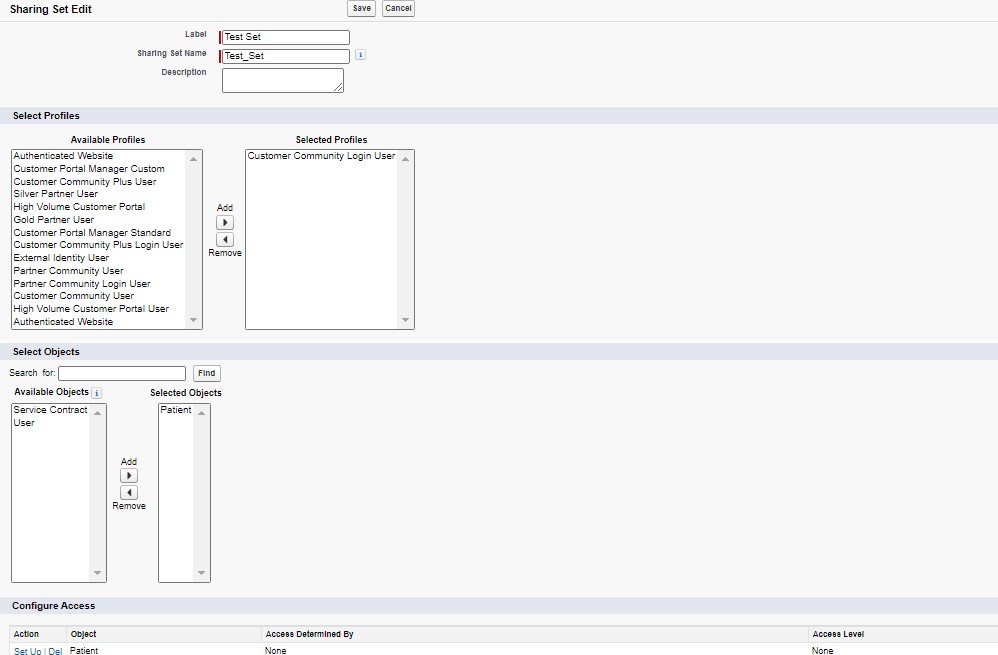
- Enter all details as below and Click Save :-
- Profiles : Select all profiles to which this sharing set should apply
- Objects : select all objects to which this sharing set should apply
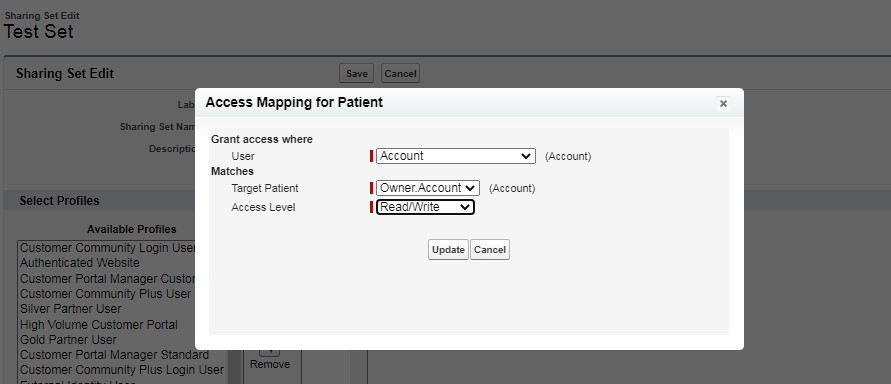
- Configure Access : Provide criteria with which records should be shared with community Users.
- Enter all details as below and Click Save :-
Maintaining Communities after setup
Once a community is created, all settings related to it can be managed under:-
Setup->’All Communities’-> Find community entry in list and Click ‘Workspaces’ besides that.

User will be redirected to below screen where all settings related to community can be managed.
